Turn Your Old Laptop Into a Proxmox Virtual Machine Server
If you have a decommissioned laptop doing nothing but collecting dust, turning it into a hypervisor for virtual machines is a perfect way to give it a chance at a new life. With Proxmox, you will have the power to spin up concurrent virtual machines to host instances of valuable applications.

If you have a decommissioned laptop doing nothing but collecting dust, turning it into a hypervisor for virtual machines is a perfect way to give it a chance at a new life. Using this setup, you will have the power to spin up concurrent virtual machines for media, file sharing, programming, networking, security, web serving, appliances, and so much more.
Why use a laptop out of all hardware?
Here are a few practical reasons:
- It already has a screen and keyboard, eliminating the need to connect those in the future when you inevitably need to troubleshoot the server.
- A battery powers it, so it will be unaffected during short power outages and give you time for safe shutdowns during longer ones.
- It draws much less power than a regular PC or server while providing comparably good performance.
The cons of using a laptop as a server would be limited potential for expansion, upgradability, and reparability. Laptops don't have PCIe slots, so you can't add a dedicated GPU or other expansion cards. They are limited to only one or two storage drive bays. Laptops are also more likely to utilize proprietary parts. The CPU is soldered on, and the RAM may or may not be upgradeable.
However, I don't think most home users and hobbyists will be affected by these drawbacks. Just bear in mind the limitations, and you will have success in your self-hosted virtualization endeavor.
What you will need at a minimum requirement:
- A working 64-bit laptop with an ethernet port
- An ethernet cable
- A USB flash drive or SD card 1GB minimum (or if not, a DVD drive and blank CD/DVD)
Installation
First things first, let's create a bootable USB flash drive.
Go to https://www.proxmox.com/en/downloads and download the latest Proxmox Virtual Environment ISO installer. Proxmox is based on good ol' Debian, so it is guaranteed to be a stable experience. You will also need balenaEtcher to flash the ISO image to the USB drive.
Plug in your USB flash drive and open up balenaEtcher. Once it's open, click on "Flash from file" and choose the Proxmox installer ISO you downloaded earlier. Select the USB drive you've plugged in as your target, then flash!

You can close Etcher and eject your USB drive when that's finished.
If you don't have a USB stick or SD card available but you do have a DVD-RW drive and a blank CD or DVD, you can accomplish the same feat with CDBurnerXP.
Prerequisites (changing BIOS settings)
We will have to change a few settings in the computer's BIOS/UEFI. To do this, you will have to enter the system settings. There's a different method for each laptop manufacturer. For most, it'll show you which key to press during the BIOS boot screen, something like ESC, F1, F2, F8, F9, F12, or DEL. On some Lenovo laptops, you press the "Novo Button" on the side. You can also look up the model of your computer if you're still unsure.
This step is essential, or else you won't be able to run any virtual machines. You will need to enable virtualization extensions for your computer's processor. On Intel CPUs, this is called VT-x, and on AMD, it's AMD-V. It might also be called "SVM mode." You will likely find this setting under the "Security" tab.
You'll also want to enable VT-d (or IOMMU for AMD) if you plan on doing any PCIe passthroughs in the future.
Installing Proxmox
It's finally time to install! Insert the USB stick into your laptop and connect it to your network with an Ethernet cable. Getting to the boot menu is similar or the same as getting to the BIOS menu. Select the USB disk to boot from, and soon you will be presented with the Proxmox Installer. Press enter on "Install Proxmox VE."

Agree to the EULA and select the internal drive to install Proxmox from the dropdown menu.

On the next page, pick your country, timezone, and keyboard layout. Then hit next.
Set a strong password for the root user and put in your email address to receive important alerts from the server. Hit next.

Now, time to set up networking. Choose the ethernet network adapter from the dropdown; it will be something like eth0 or enp0. Don't pick the one that's wifi0 or wlan0.
Let's skip the hostname and go straight to the last three fields. I will ask you, the reader, to pull up the Wi-Fi settings on your phone. It will make this part easier to understand if you're unfamiliar.
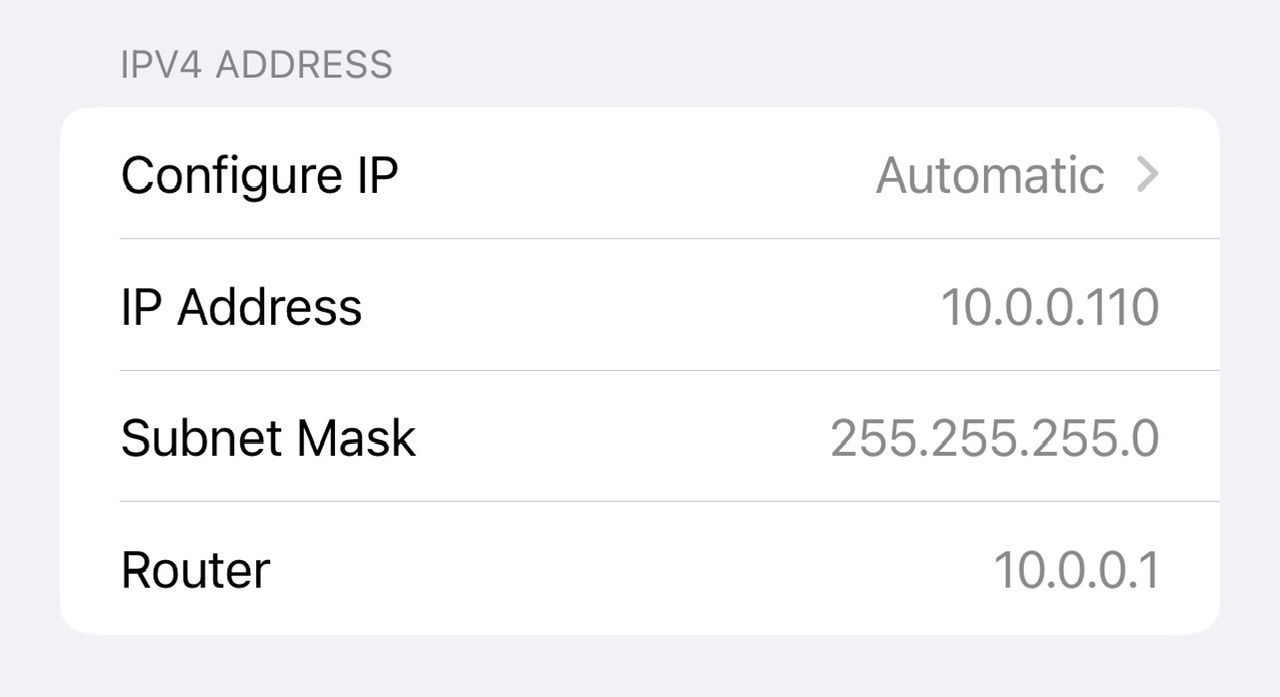
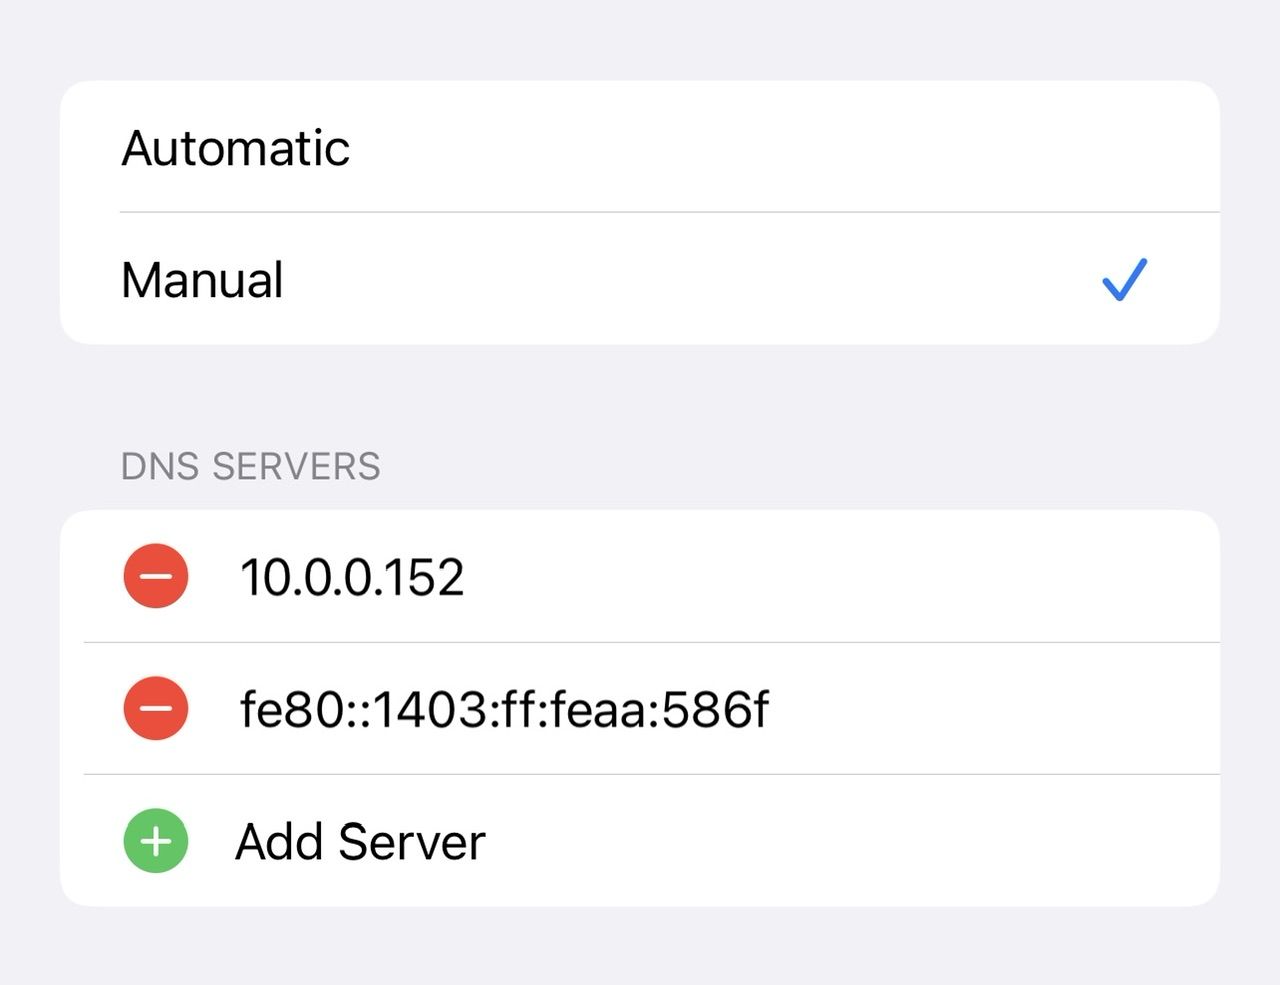
Tap on the info (ℹ) button next to your home's Wi-Fi network. Look for the following four IPv4 settings: IP address, Subnet Mask, Router/Gateway, and DNS. Here is what mine looks like on my iPhone:


Copy the IP addresses for your Router/Gateway and DNS Server to Proxmox. If your Subnet Mask is 255.255.255.0, leave the CIDR notation as 24. If not, follow this cheat sheet.
Next, assign a static IP address to your new Proxmox machine. I recommend just picking the IP address that is right after the one your phone has. My phone is 10.0.0.110, so for convenience's sake, I'll assign 10.0.0.111 to Proxmox.
Okay, back to the hostname. Proxmox is asking for a fully qualified domain name (FQDN), so you should come up with a hostname and domain name for your home network and add .local to the end of that. It should look something like myhostname.myhomenetwork.local.
Here is my final network configuration:

Confirm all the information on the following summary page, and install and reboot.
Post-installation
Open a web browser on another PC and navigate to https://x.x.x.x:8006 (replace x.x.x.x with the server's IP address). It might say that "the following website is untrusted" or "may be trying to steal your information," but you need not worry; that is only because the SSL certificate is self-signed by Proxmox and not by a Certificate Authority (CA). No data is being stolen; this server is running inside your local network and is set up by you.
Log in as the root user and the password that you set earlier. Now, if you are running on a laptop, this next part will show you how to turn off automatic sleep when the laptop lid is closed. Instead, we will make it so that the screen turns off when the lid is shut, but the laptop stays powered on. Here's how to do it.
Open the shell for the root user. You will need to edit the configuration file that controls suspend lid switch. Do this by running nano /etc/systemd/logind.conf.
Look for each of the following lines in the logind.conf file:
#HandleSuspendKey=suspend
#HandleLidSwitch=suspend
#HandleLidSwitchDocked=ignoreChange those lines to look like this instead:
HandleSuspendKey=ignore
HandleLidSwitch=ignore
HandleLidSwitchDocked=ignore# at the start of the line.Hit Ctrl+X to save and exit, then reboot the server.
Congratulations! You have successfully installed Proxmox Virtual Environment. Have a look around and have fun installing some virtual machines and containers.
COMING SOON: 4 Things to Do After Installing Proxmox
